Texture Chic Deckle Rectangle Birthday card

I keep returning to the Texture Chic paper pack for projects, it is such a versatile paper pack. For this card I paired it with the Deckle Rectangle dies.

Card Base: Cut Soft Suede 8 ½ X 11 paper in half widthwise. You now have two pieces 8 ½ X 5 ½ Fold one of the pieces in half lengthwise for your card front. The card front now measures 4 ¼ X 5 ½.
Card Mat: Cut Basic White paper 4 X 5 ¼.
Card Front: Cut Texture Chic paper 4 X 5 ½, die cut this piece with the Deckle rectangle die that fits just inside this piece. Attach this die cut piece to the white card mat. Attach these pieces to the Soft Suede card base.
Cut Soft Suede 2 ¾ X 4 ¼, die cut this piece with the Deckle rectangle die that fits just inside this piece.
Cut another piece of Texture Chic paper 2 ½ X 4, die cut this piece with the Deckle rectangle die that fits just inside this piece. Cut Basic White 2 5/16 X 3 ⅝. (If you don’t want to cut sixteenths, cut your Basic White piece 2 ⅜ X 3 ⅝.) Attach die cut Texture Chic piece to the Basic White piece.
Cut 4 ½ of Petal Pink Soft ribbon. Attach Tear & Tape to the back of the ribbon. Remove backing from ribbon and wrap around the Texture Chic/Basic White piece. I attached my ribbon 1” from the bottom. Attach these pieces to the Soft Suede piece. Attach these pieces to the card front.
Die cut the smallest circle from Basic White with the Stylish Shapes Dies. Stamp birthday greetings on the white circle with Soft Suede ink.
Attach the circle over the ribbon. Add 3 Soft Succulent Festive Pearls to the card front.

Card Insert: For the inside of your card, cut a piece of Basic White 4 X 5 ¼. Cut a piece of print paper used on the front of your card ½ X 4 (5 ¼). Attach to the top of the card insert. Stamp a sentiment or write a note before attaching this piece inside your card.
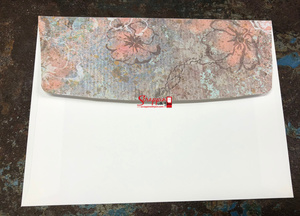
Envelope Flap: If you want to cover your envelope flap to match your card, you can find directions here: http://www.scrappinwithjoni.com/blogs/covering-your-envelope-flap
 Texture Chic 12" X 12" (30.5 X 30.5 Cm) Specialty Designer Series Paper
158808
Texture Chic 12" X 12" (30.5 X 30.5 Cm) Specialty Designer Series Paper
158808
 Soft Suede Classic Stampin' Pad
126978
Soft Suede Classic Stampin' Pad
126978
 Very Best Occasions Cling Stamp Set (English)
159871
Very Best Occasions Cling Stamp Set (English)
159871
 Basic White 8 1/2" X 11" Cardstock
159276
Basic White 8 1/2" X 11" Cardstock
159276
 Soft Suede 8-1/2" X 11" Cardstock
115318
Soft Suede 8-1/2" X 11" Cardstock
115318


 Petal Pink 3/8" (1 Cm) Soft Polyester Ribbon
159192
Petal Pink 3/8" (1 Cm) Soft Polyester Ribbon
159192

