Pretty Prints Butterfly card

The Pretty Prints paper pack is versatile, ready to be used for all kinds of cards. This card uses two of the papers from the pack. The butterfly is cut from a second paper in the pack.

Card Base:
Cut Coastal Cabana 8 ½ X 11 paper in half widthwise. You now have two pieces 8 ½ X 5 ½ Fold one of the pieces in half lengthwise for your card front. The card front now measures 4 ¼ X 5 ½.
Card Mat:
Cut Basic Black paper 4 X 5 ¼.
Card Front:
Cut print paper from the Pretty Prints paper pack 3 ⅞ X 5 ⅛. Attach the print card front to Black card mat. Attach card front/card mat to the card base.
Use the largest die in Tailor Made Tags to cut a tag from Basic White.
Stamp sentiment from Go To Greetings with black ink on the bottom of the tag.
Use the largest open die in Brilliant Wings to cut a butterfly from a print paper in the Pretty Prints paper pack.
Attach the butterfly to the tag with glue dots on the back of the body of the butterfly, fold the wings up.
Add 3 rhinestone basic jewels to the tag.
Cut 6” of white crinkled seam binding. Color the ribbon with a light Bermuda Bay Blends. Attach ribbon to the top of the tag.
Attach the decorated tag to the card front.
That’s it; you have finished your card front. For the inside of your card, cut a piece of Basic White 4 X 5 ¼. Stamp a sentiment or write a note before attaching this piece inside your card.
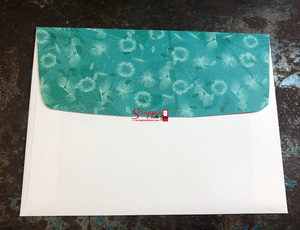
If you want to cover your envelope flap to match your card, you can find directions here: http://www.scrappinwithjoni.com/blogs/covering-your-envelope-flap
 Go To Greetings Cling Stamp Set (English)
158763
Go To Greetings Cling Stamp Set (English)
158763
 Tuxedo Black Memento Ink Pad
132708
Tuxedo Black Memento Ink Pad
132708
 Pretty Prints 12" X 12" (30.5 X 30.5 Cm) Designer Series Paper
159245
Pretty Prints 12" X 12" (30.5 X 30.5 Cm) Designer Series Paper
159245
 Basic Black 8-1/2" X 11" Cardstock
121045
Basic Black 8-1/2" X 11" Cardstock
121045
 Coastal Cabana 8-1/2" X 11" Cardstock
131297
Coastal Cabana 8-1/2" X 11" Cardstock
131297
 Basic White 8 1/2" X 11" Cardstock
159276
Basic White 8 1/2" X 11" Cardstock
159276
 Basic White Medium Envelopes
159236
Basic White Medium Envelopes
159236
 Whisper White 1/4" (6.4 Mm) Crinkled Seam Binding Ribbon
151326
Whisper White 1/4" (6.4 Mm) Crinkled Seam Binding Ribbon
151326
 Rhinestone Basic Jewels
144220
Rhinestone Basic Jewels
144220


