Enjoy the Journey embossed card

Many of the papers in the Enjoy the Journey has a different design on each edge. I paired this design with embossing and a die cut image to make this great card.

Card Base: Cut Mango Melody 8 ½ X 11 paper in half widthwise. You now have two pieces 8 ½ X 5 ½ Fold one of the pieces in half lengthwise for your card front. The card front now measures 4 ¼ X 5 ½.
Card Mat: Cut Basic Black paper 4 X 5 ¼.
Card Front: Cut print paper from Enjoy the Journey paper pack 3 ⅞ X 5 ⅛. Attach the card front to the black card mat. Emboss this piece with the Into The Clouds embossing folder. Attach this embossed piece to the card base.
Use the mountain bike ride die cut from the Greatest Journey die set to cut a mountain bike rider from Basic Black. Attach to the card front with dimensionals.
Card Insert: For the inside of your card, cut a piece of Basic White 4 X 5 ¼. Cut a piece of print paper used on the front of your card ½ X 4 (5 ¼). Attach to the top of the card insert. Stamp a sentiment or write a note before attaching this piece inside your card.

This paper has the same design in two different colors. This card used the other edge of the paper. I used a Pumpkin Pie card base. You can see how I cut the paper in this YouTube video: https://youtu.be/wt9DALHHNhM
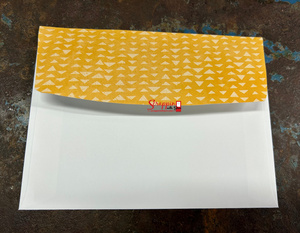
Envelope Flap: Cut print paper 2 ¼ X 6. Glue the print paper to the envelope flap and trim using the flap as a guide.
 Enjoy The Journey 12" X 12" (30.5 X 30.5 Cm) Designer Series Paper
160586
Enjoy The Journey 12" X 12" (30.5 X 30.5 Cm) Designer Series Paper
160586

 Into The Clouds Embossing Folder
159171
Into The Clouds Embossing Folder
159171
 Basic Black 8-1/2" X 11" Cardstock
121045
Basic Black 8-1/2" X 11" Cardstock
121045
 Basic White 8 1/2" X 11" Cardstock
159276
Basic White 8 1/2" X 11" Cardstock
159276
 Mango Melody 8-1/2" X 11" Cardstock
146989
Mango Melody 8-1/2" X 11" Cardstock
146989
 Pumpkin Pie 8-1/2" X 11" Cardstock
105117
Pumpkin Pie 8-1/2" X 11" Cardstock
105117

